Made2Manage Typical Purchase Order to Invoice Process
This outline illustrates the steps to process an Invoice from a vendor matched and verified against a Purchase Order created and received in M2M. This presents this process in a training outline format, assuming that you are creating the vendor and purchase order in M2M.
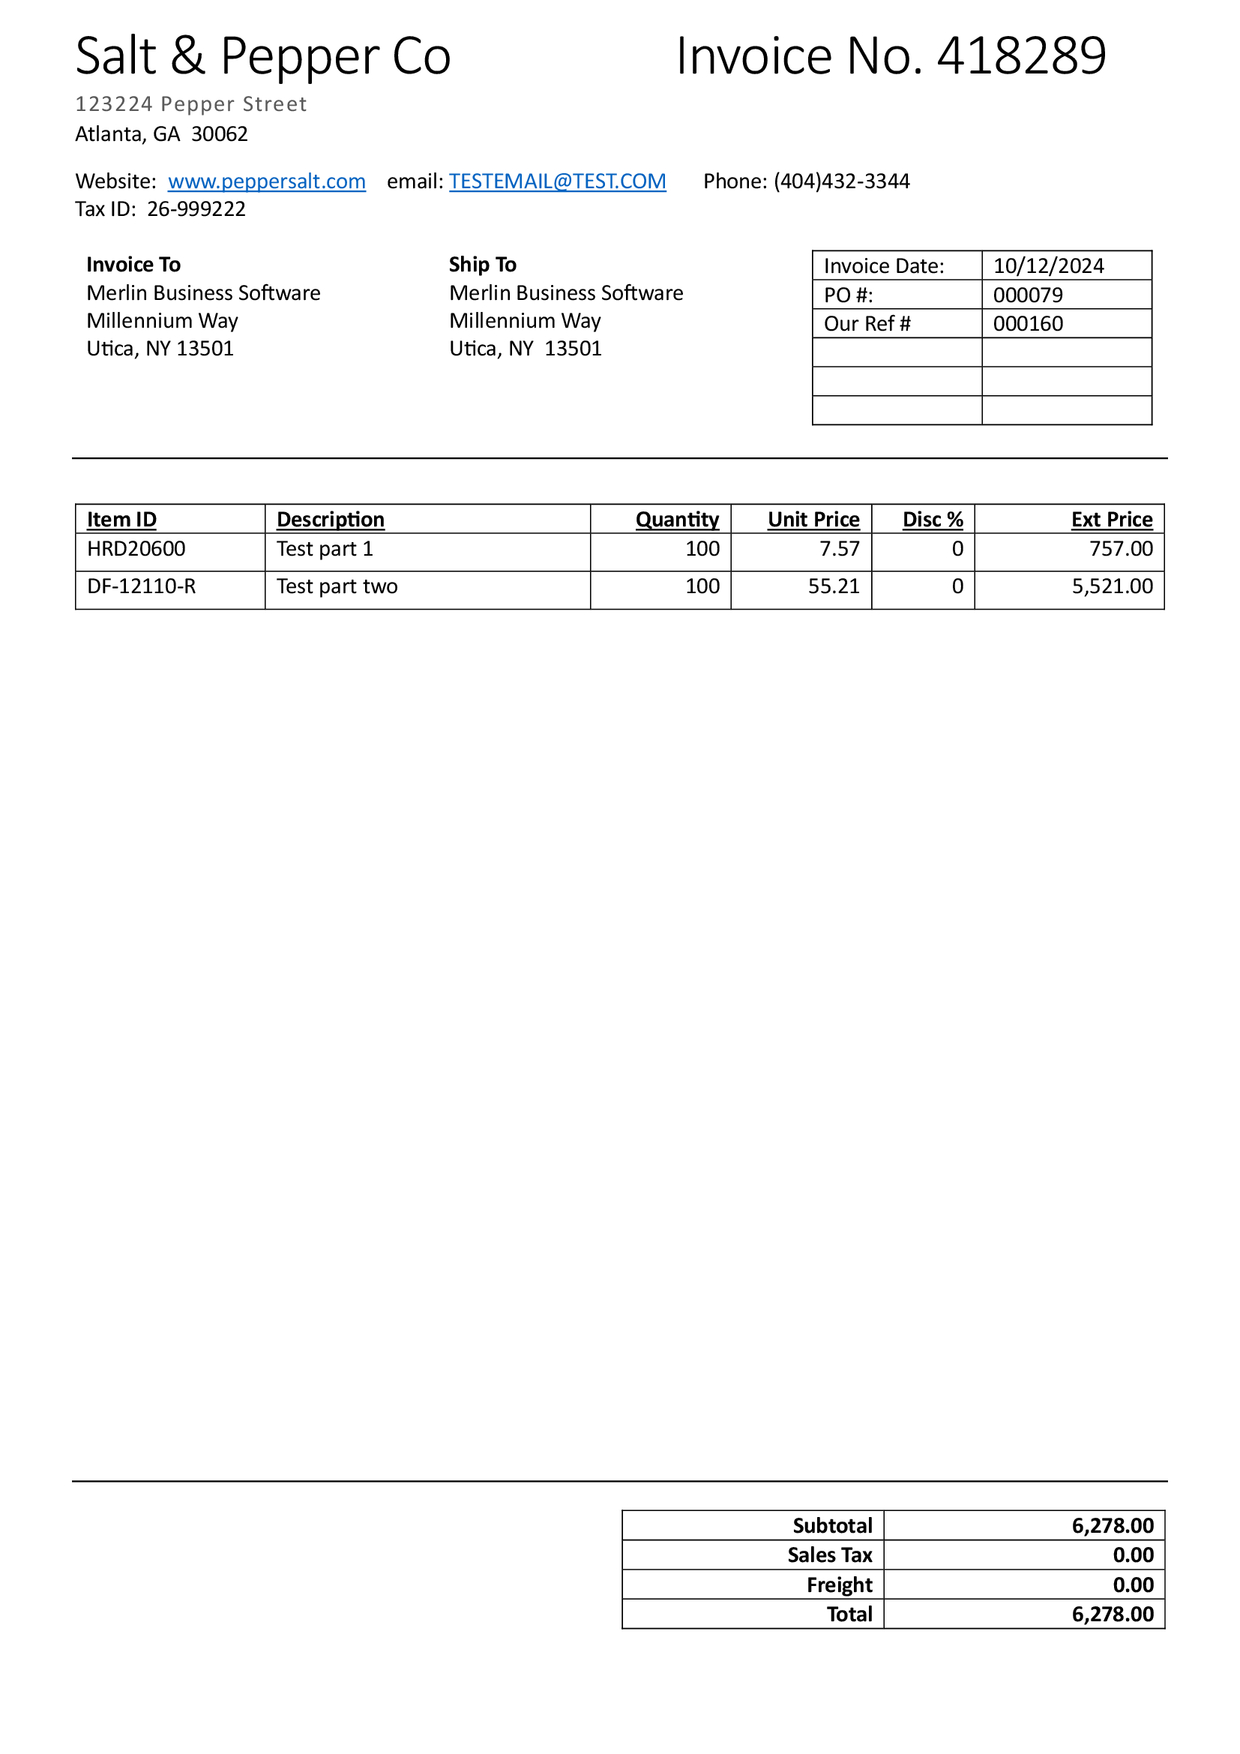
For this example we will use a ficticious invoice from the vendor 'Salt & Pepper Co':
Create the Vendor
Made2Manage
First we need to confirm the vendor is setup in M2M and is approved:
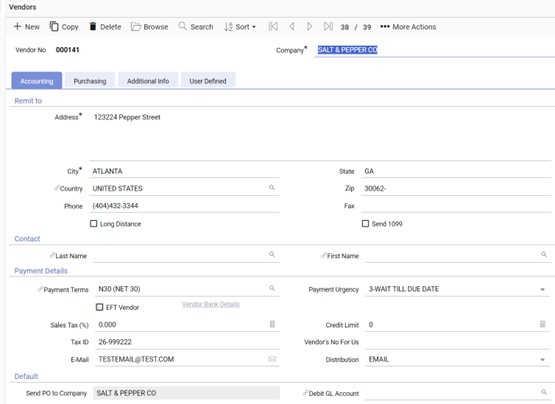
- If needed, create the vendor in M2M & press save.
- If the Vendor has not yet been approved, change its status from Started to Approved.
Did you know?
Only approved Vendors are available for use in Invoice Automation, once approved it will be visible in Invoice Automation within a minute.
Invoice Automation
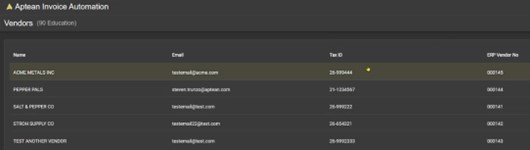
Now lets check the Vendor screen in Invoice Automation to confirm it has been created sucessfully.
Using the User Menu in the upper right select Settings, Connected ERP Data, Vendors. Our new vendor should be listed, you can use the search box to help find the vendor quickly.
Create the Purchase Order
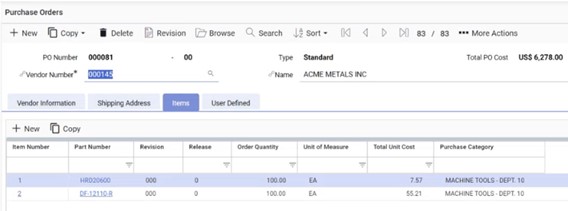
Next lets create a new Purchase Order in Made2Manage using the Vendor we created above & the line items from our ficticious Invoice.
- Create a new PO using the Vendor # from the previous step
- Enter any optional fields such as Ship via as desired
- Click 'Save'
- Add the line items from the invoice PDF ensuring the Quantity & Unit Price match the PDF
- Check the Subtotal to ensure it matches the PDF
- Change the status from Started to Opened
Make a note of the PO Number, we will need this later
Did you know?
Only Purchase Orders with the status Open are available in Invoice Automation
Create the Receiver
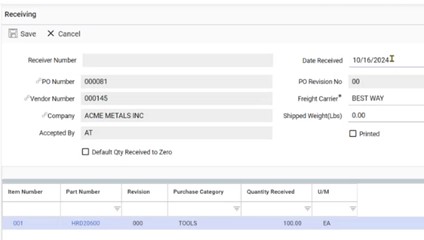
Next we'll create the Receiver in Made2Manage, for this we will use the Copy function to copy from the Purchase Order. For this scenario we will receive all of the items on the PO.
Partial Receivers are also supported
Partial Receivers are also supported, only Invoices which M2M has received enough goods for will be exported from Invoice Automation
- In the Receiving sceen select 'Copy from PO' in the 'Copy' dropdown
- Choose your PO using the PO Number from the previous step
- Select all the line items as we will be receiving everything on the PO
- Click 'Save' & change the status from Open to Received
Did you know?
Only Receivers with the Received Status can be used to match to an invoice in Invoice Automation
Uploading the Invoice
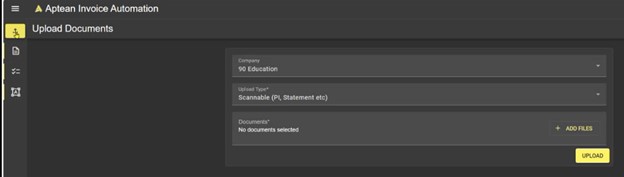
Now lets upload the Invoice in Invoice Automation to begin the matching process.
- Navigate to the Upload Documents screen, if required choose the M2M company you want to upload the document into.
- Select the invoice PDF to upload. You can do this either by dragging the PDF file onto the screen or by clicking the '+ Add Files' button.
- Click 'Upload'
Checking the result in Invoice Automation
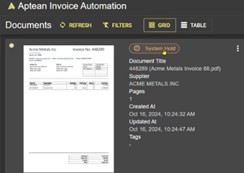
Now the document has been uploaded, we can switch to the Document List View so see the result.
Please note
The document will typically take around one minute to move from the 'Uploaded' status, during busy times this may take longer however.
After Invoice Automation has finished analysing the document it will change status. Typically the document will change to either Failed, System Hold or Exported, however other statuses could occur, please refer to Statuses for more information.
Invoice Automation first checks to see if a template already exists that matches this invoice format & Vendor. If not, it will use Artificial Intelligence to attempt to automatically generate a template.
- If the status changes to Failed, then the AI Automatic Templating was not able to create a template for this invoice, please refer to Template Editor for more information on manually creating the template.
- If the status changes to System Hold, click on the document to confirm the details Invoice Automation has detected, Validation Errors will help guide you through troubleshooting what issues the document may have. For exmaple, the IA Auto Templating feature may not of selected the correct value for the Purchase Order Number, or there may be $ discrepancies between the PO & the Invoice that need to be approved.
Once any issues have been resolved the document should move to the Exported status. This is the final status in Invoice Automation and signifies that the Invoice has been sent back to M2M via the syncing integration.
Did you know?
Once an invoice has been Exported, it is locked & can no longer be changed in Invoice Automation
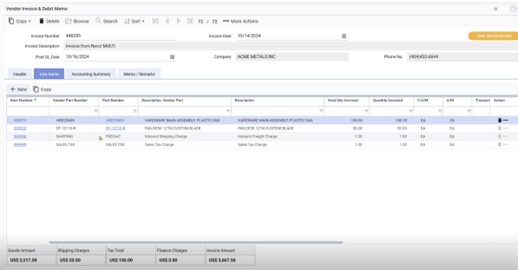
Checking the result in Made2Manage
Finally we will check the result in M2M via the APINV screen.
- Navigate to the APINV - Vendor Invoice & Debit Memo screen
- Search for the invoice using the Invoice Number, or click the last record icon.
- Confirm if this is the correct invoice that we just processed, checking the Invoice Number, Dates, Line Items Details & Totals